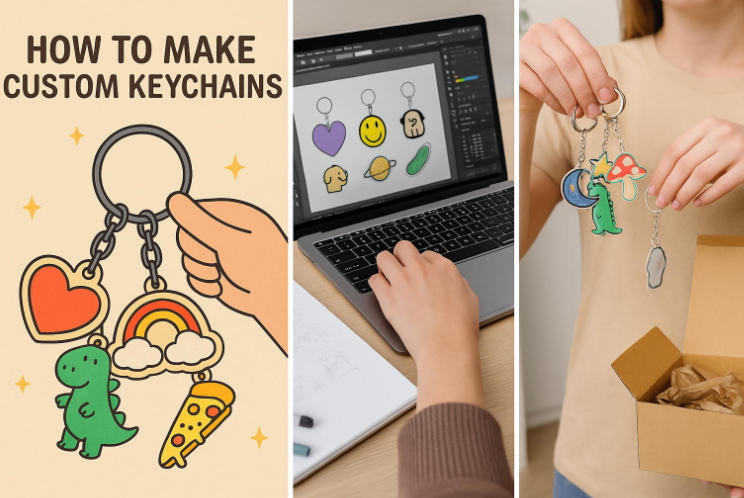
Designing Your Custom Resin Keychain
Creating custom resin keychains is an art form, and designing them is where your creativity can truly shine. This cluster will explore the different design choices and elements you can incorporate into your resin keychain creations, from shapes and personalization to the balance between simplicity and detail. Whether you're looking for a simple, cute design or something more complex and detailed, this cluster provides all the insights you need to create stunning pieces.
Selecting the Right Shape for Your Keychain
Choosing the right shape for your resin keychain is an essential step in defining its character and appeal. Here are some popular shapes to consider:
Rectangular: A classic shape that offers plenty of room for detailed designs and personalization.
Circle: A versatile, timeless shape that works well for geometric or minimalist designs.
Heart: Perfect for romantic or cute themes, ideal for gifting and special occasions.
Star: Adds a fun and playful touch, great for decorative and whimsical keychains.
Custom Shape: Have a unique design in mind? Custom shapes let you tailor your keychain to any idea.
By selecting the shape that aligns with your theme and personal preference, you ensure your resin keychain stands out!
Simple vs. Detailed Designs: What Works Best?
When designing your custom resin keychain, one of the first decisions you’ll face is whether to go for a simple or detailed design. Both options have their merits, and understanding the difference can guide you in creating the perfect keychain.
Simple designs are minimalistic, typically involving clean lines and a lack of heavy detail. Think smooth matte finishes and minimalist shapes like circles or rectangles. These designs are easier to create, often require fewer colors, and are great for personalized pieces, such as keychains with initials or short messages.
On the other hand, detailed designs allow for intricate patterns, such as floral elements, geometric designs, or multiple layers of colored resin. These keychains are perfect if you want to showcase more artistic flair, but they may require more precision, additional tools, and curing time. Detailed designs are also more likely to incorporate embellishments like glitter or small items embedded in the resin, adding texture and depth.
Using Molds for Keychain Designs
Silicone molds are an excellent way to bring your custom resin keychain designs to life. Here are the benefits of using molds in your keychain creation process:
Accuracy: Molds provide consistent shapes and sizes.
Customization: Available in various pre-made shapes or custom-designed molds.
Ease of Use: Molds reduce the complexity of handcrafting and speed up the process.
| Mold Shape Type | Ideal Design Use | Benefits |
|---|
| Rectangle | Great for simple shapes and text | Versatile, easy to work with |
| Heart | Perfect for romantic or sentimental designs | Adds a personal, emotional touch |
| Circle | Works well for geometric or abstract designs | Simple, classic, and clean |
| Custom Shape | For unique or themed designs | Tailored to your creative ideas |
Using molds ensures your designs are uniform and professional while allowing for a range of possibilities. This approach is ideal for those starting out or looking for quick results.
Incorporating Personalization: Letters, Names, and Symbols
Adding a personal touch to your resin keychain is a great way to make it special. Here’s how you can personalize your keychains:
<step 1> Choose Your Personalization: Decide if you want to include letters, initials, or symbols. Popular choices include names, initials, favorite quotes, or meaningful symbols like hearts or stars.
<step 2> Prepare the Resin: Mix your clear resin and add pigments if you wish to match the personalization with specific colors.
<step 3> Use Stencils or Molds for Accuracy: If you're adding text, use stencils for a neat and professional look. Alternatively, a silicone mold with pre-designed spaces for letters or symbols can make the process faster.
<step 4> Pour Resin and Add Personal Touches: Carefully pour the resin into the mold, making sure your design is centered. Add small embellishments or glitter as accents if desired.
<step 5> Cure and Finalize: Allow the resin to cure properly. After curing, your personalized keychain is ready to use or gift!
Personalizing your keychain ensures that it carries a unique touch that reflects the owner’s personality, making it perfect for gifts, souvenirs, or as a keepsake.
Geometric vs. Abstract Designs for Resin Keychains
When creating custom resin keychains, choosing between geometric and abstract designs can set the tone for your piece. Let’s explore how each style differs:
Geometric Designs:
Defined by clear, structured patterns like squares, circles, triangles, or diamonds.
Often incorporates sharp lines, making them ideal for modern or minimalist keychains.
Works well with clear resin, offering a sleek, clean finish.
Popular in contemporary art and can be paired with metallic or glossy finishes.
Abstract Designs:
More freeform, incorporating random shapes, swirls, and fluid lines.
Often uses vivid colors and a mix of textured finishes, making them bold and expressive.
Perfect for personalized designs that reflect creativity and individuality.
Can incorporate dried flowers, glitter, and other embellishments to give depth and uniqueness.
In conclusion, both styles offer unique aesthetics, so your choice depends on the overall vibe you want your keychain to express. Geometric designs bring order and structure, while abstract designs convey creativity and freedom.
Designing custom resin keychains is a fun and creative process that allows you to infuse your personality into every piece. Whether you’re selecting the right shape, deciding between simple or detailed designs, or incorporating unique personal touches, there’s a design style to suit every taste. Use molds, experiment with shapes, and embrace personalization to make your keychains truly one-of-a-kind. Let your imagination lead the way and create beautiful resin keychains that capture the essence of your creativity!
Resin Casting Techniques for Keychains
In this cluster, we’ll explore various techniques used in resin casting, which is the core of creating custom resin keychains. From the basic process of mixing and pouring resin to more advanced techniques like incorporating embellishments and handling curing issues, this section will provide all the information you need to perfect your resin casting process. By mastering these techniques, you’ll be able to craft smooth, durable, and beautifully designed keychains.
Step-by-Step Resin Casting Process
When it comes to casting resin for keychains, following a precise step-by-step process is crucial to ensure quality results. Here’s a breakdown of the process you need to follow:
<Step 1> Prepare Your Molds and Workspace:
<Step 2> Mix the Resin:
Measure the appropriate amount of resin and hardener according to the manufacturer's instructions.
Mix thoroughly, making sure there are no streaks or bubbles in the mixture.
<Step 3> Pour the Resin Into the Mold:
Carefully pour the resin mixture into the mold, filling it just below the brim.
If adding any decorative items like glitter or dried flowers, place them into the mold at this stage.
<Step 4> Allow the Resin to Cure:
Leave the mold undisturbed for the recommended curing time.
Depending on the resin type (epoxy or polyester), the curing time can vary.
<Step 5> Remove and Finish:
Once cured, remove the resin from the mold and check for imperfections.
Sand or polish the edges if necessary for a smooth finish.
How to Prevent Air Bubbles in Resin Keychains
Air bubbles can be a major issue in resin casting, ruining the smoothness of the final product. Here are some techniques to minimize or prevent air bubbles:
Mix Resin Slowly:
Stir the resin mixture slowly to avoid introducing air into the resin.
Use a Heat Gun or Torch:
After pouring the resin, gently heat the surface with a heat gun or torch to release any trapped air bubbles.
Vacuum Chamber:
If you’re working with large batches, a vacuum chamber can be used before pouring to remove air from the resin.
Work in Smaller Batches:
Smaller batches of resin are easier to mix evenly and reduce the chance of bubbles forming.
Use Resin Without Bubbles:
Some resin products are designed to minimize air bubbles. Consider using casting resin or epoxy resin specifically formulated for bubble resistance.
Adding Embellishments: Glitter, Dyes, and Small Items
The beauty of custom resin keychains lies in the ability to add unique touches. You can personalize your keychains with glitter, dyes, and small items. Here are some tips:
Glitter:
Add glitter for a shimmering, sparkly effect. Mix glitter directly into the resin before pouring, or sprinkle it on the surface after pouring.
Dyes:
Resin dyes are a fantastic way to create colorful keychains. You can experiment with various colors like blue, green, red, or even pastel shades.
Small Decorative Items:
Add small items like dried flowers, beads, or tiny charms into the resin. Arrange them carefully in the mold for a visually appealing design.
Use Different Colors:
You can create layers of colored resin by letting one layer cure before adding another. This technique allows for multi-colored designs and effects.
Shape and Design:
Be mindful of the overall shape and design you want for your keychain. Adding embellishments should complement the final shape and not overcrowd it.
Curing Time and How to Avoid Resin Defects
Proper curing is vital for the quality of your resin keychain. An inadequate cure can lead to defects like a sticky surface, bubbles, or warping. Here are the key factors to consider during the curing process:
Follow Manufacturer Instructions:
Always follow the curing times specified by the resin manufacturer. Epoxy resin may require 24-48 hours to cure fully, while polyester resin may cure faster.
Avoid High Humidity:
High humidity levels can affect the curing process. If possible, cure your keychains in a dry, controlled environment.
Check for Stickiness:
If the resin remains sticky after the recommended curing time, it may not have mixed properly. Consider using a hardener or curing accelerator.
Post-Cure Heat Treatment:
Some resins benefit from a post-cure heat treatment to enhance hardness and prevent yellowing. This is particularly useful for larger or thicker pieces.
Flat Surface Curing:
Ensure your molds are placed on a flat surface while the resin cures to avoid warping or uneven edges.
Dealing with Resin Waste and Leftovers
Resin crafting can generate a lot of waste, so it’s important to deal with leftovers responsibly. Here are some ways to handle resin waste:
| Type of Waste | Disposal Method | Recycling Options |
|---|
| Unmixed Resin | Dispose in a well-ventilated outdoor area. | Donate to others for small projects. |
| Resin Scraps | Collect and reuse in future projects. | Use scraps in decorative items. |
| Cured Resin Chips | Can be disposed of in trash. | Shard pieces can be incorporated in new designs. |
| Resin Packaging | Check for recycling symbols before disposal. | Reuse containers for storage or disposal of non-toxic materials. |
By being mindful of waste, you can minimize the environmental impact of your resin crafting while staying sustainable in your practices.
Advanced Resin Pouring Techniques for Complex Designs
When you’re ready to take your resin keychains to the next level, consider using advanced pouring techniques. These methods allow for multi-layered or more intricate designs that create depth and visual interest:
Layering Techniques:
Pour resin in layers, allowing each layer to partially cure before adding the next. This technique allows for more control over color placement and adds dimension to the design.
Swirl Technique:
Swirl different colors of resin together for a marbled effect. This technique can create beautiful, abstract patterns, making each keychain unique.
Incorporating 3D Objects:
You can embed 3D objects such as small charms, figurines, or beads within the layers of resin. This is perfect for creating keychains with personality.
Use of Transparent and Opaque Resins:
Mixing clear resin with opaque colors can produce striking visual contrasts. Experimenting with both types can produce modern, edgy designs.
These advanced techniques will open up endless possibilities for creating one-of-a-kind resin keychains.
By mastering these resin casting techniques, you’ll be well on your way to creating stunning custom resin keychains. Whether you're a beginner or an experienced crafter, understanding these processes and methods will ensure your keychains have a smooth, professional finish with unique, personalized designs.
Finishing and Detailing Your Resin Keychains
When making custom resin keychains, the finishing touches are crucial to creating a polished, professional look. From sanding to choosing the right attachments, these final details enhance your keychain's durability and appeal.
Sanding and Polishing Resin Keychains for a Smooth Finish
Achieving a smooth and glossy finish for your custom resin keychains requires attention to detail. Follow these steps for the best results:
Initial Sanding
Medium Sanding
Fine Sanding
Polishing
Cleaning
By following these steps, your resin keychain will have a smooth, polished appearance that enhances its overall quality and appeal.
Adding Keychain Attachments: Split Rings, Clips, and More
Attaching your keychain hardware properly ensures that it is both functional and stylish. Here are some of the most popular attachment types for custom resin keychains:
Split Rings
Lobster Clasp
Chains and Cords
Metal Rings
Each attachment type can change the overall look and feel of your custom keychain. Select one that matches the style and functionality you're aiming for.
Protecting Your Resin Keychain from Wear and Tear
After all the hard work of creating a custom resin keychain, it’s essential to protect it from the wear and tear of everyday use. Over time, resin can become scratched, stained, or lose its glossy finish if not properly protected. One of the most effective ways to protect your resin keychain is by using a protective coating.
A clear resin sealer can be applied to your keychain’s surface to create a durable, protective layer. This sealer not only shields the resin from UV damage that can cause yellowing but also adds an extra layer of gloss. A matte finish sealer can also be applied for those who prefer a more subtle look.
In addition to sealers, consider using a soft pouch or a storage box for your keychain when not in use. Keeping your resin keychains in a protective container can prevent them from getting scratched or damaged when thrown into bags or pockets.
Lastly, be cautious when cleaning your resin keychain. Avoid abrasive materials or harsh chemicals that can degrade the resin surface. Use a soft microfiber cloth to gently wipe away any dirt or oil that may accumulate on the surface.
Protecting your resin keychain will ensure it stays beautiful and functional for years to come.
Selling and Marketing Your Custom Resin Keychains
Selling and marketing custom resin keychains involves understanding pricing, promotion, and effective distribution strategies. Whether you're selling them online or locally, these tips will guide you in turning your creative hobby into a thriving business.
1: Setting Prices for Custom Resin Keychains
Pricing your resin keychains correctly is crucial for attracting customers while ensuring profitability. Here’s how to set a reasonable price:
Material Costs: Consider the price of materials like epoxy resin, molds, keyring attachments (split rings, lobster clasps), and any additional embellishments like glitter, beads, or flowers.
Labor: Factor in the time spent designing, pouring, curing, and finishing each keychain.
Market Research: Analyze competitors' pricing, focusing on similar custom resin keychains to find a competitive yet fair price.
Profit Margin: Ensure that the price includes a healthy profit margin while being affordable for your target market.
By balancing these elements, you can set a fair price that reflects both the quality of your product and market demand.
2: Creating an Online Store to Sell Resin Keychains
To reach a broader audience, setting up an online store is essential for selling your custom resin keychains. Whether using platforms like Etsy, Shopify, or your own website, here's how to get started:
When building your online store, choose a platform that suits your needs. Etsy is great for handmade items like resin keychains, while Shopify offers more customization options for larger businesses. Both platforms provide easy setup tools and secure payment processing.
Product Photography is key in an online store, as customers can’t physically touch or hold your keychain. Invest time in creating clear, high-quality images that show off the details of your designs—focus on different angles and highlight special features like glossy finishes or intricate mold shapes.
Write Compelling Product Descriptions. Include details like size, color options, and any customization possibilities. Also, be sure to mention the resin type you use (epoxy resin, polyester resin, etc.) and the design style (geometric, floral, etc.), as this helps with SEO and customer interest.
Finally, ensure good customer service by having clear shipping policies, return procedures, and timely communication with your buyers. This builds trust and encourages repeat business.
3: Social Media Strategies for Marketing Resin Keychains
Leveraging social media to market your custom resin keychains is essential for visibility. Here's a step-by-step strategy to help you succeed:
<Step 1: Choose the Right Platforms>
Focus on platforms like Instagram and Pinterest, where visual content thrives. These platforms are perfect for showcasing the colors, shapes, and unique designs of your resin keychains.
<Step 2: Create Engaging Content>
Post high-quality images and videos of your resin keychains, focusing on the design process, finished products, and behind-the-scenes content. Use stories, reels, and posts to keep followers engaged.
<Step 3: Use Hashtags Wisely>
<Step 4: Engage with Your Audience>
<Step 5: Collaborate with Influencers>
By following these steps, you can build a loyal following and generate more sales for your resin keychains.
4: Packaging and Shipping Resin Keychains for Customers
When packaging and shipping your custom resin keychains, you need to ensure they arrive safely and in style. Below is a table outlining the best packaging practices:
| Packaging Element | Purpose | Best Practices |
|---|
| Protective Padding | Prevents damage during shipping | Use bubble wrap, foam inserts, or packing peanuts to protect the keychain from impact. |
| Box or Envelope | Secure and neat presentation | Choose a sturdy box for larger keychains or padded envelopes for smaller ones. Add a "Thank You" note for a personal touch. |
| Shipping Labels | Clear identification of order | Print clear, accurate shipping labels and tracking numbers for easy delivery tracking. |
| Branding | Enhances customer experience | Add branded stickers or custom wrapping to make your keychains feel special and professional. |
This packaging strategy ensures your resin keychains will not only arrive safely but also make a lasting impression on customers, promoting repeat business and positive reviews.
Selling and marketing custom resin keychains requires attention to detail in both pricing and presentation. By setting competitive prices, building a strong online presence, using social media to your advantage, and ensuring excellent packaging, you can establish a successful resin keychain business.
Troubleshooting Common Resin Keychain Problems
When crafting custom resin keychains, it’s common to encounter issues during the process. Whether it's sticky resin, air bubbles, or imperfections, addressing these challenges early can help ensure a smooth, professional-looking final product. This guide will help you troubleshoot and resolve the most common resin keychain problems.
1. What to Do When Your Resin is Sticky After Curing
One of the most frustrating problems when making resin keychains is sticky resin after curing. This issue can arise due to several factors, but here’s how you can fix it:
Causes of Sticky Resin:
Incomplete curing due to insufficient mixing.
Incorrect resin-to-hardener ratio.
Using a low-quality resin that doesn't cure properly.
Fixing Sticky Resin:
Step 1: Lightly sand the sticky surface using fine-grit sandpaper (around 400-600 grit). This helps remove the uncured layer.
Step 2: Apply a thin coat of clear resin over the surface and let it cure again. This will seal the sticky areas and give it a smooth finish.
Step 3: If sanding doesn’t work, place the keychain in a warmer location for 24-48 hours to allow for complete curing. Sometimes resin requires additional heat to fully set.
2. How to Fix Bubbles and Imperfections in Resin Keychains
Bubbles in resin keychains are a common issue, but there are several strategies you can employ to avoid them or fix them if they appear.
Preventing Air Bubbles:
Fixing Air Bubbles:
Method 1: Use a heat gun or torch to pass over the surface after pouring to pop any bubbles that have formed.
Method 2: For larger bubbles that are trapped inside the resin, use a needle or pin to carefully pierce and release the trapped air before curing.
Sanding Imperfections:
3. Dealing with Resin Yellowing Over Time
Over time, some resin keychains may develop a yellowish tint, especially when exposed to sunlight. This is typically a result of UV damage or using low-quality resin. The yellowing process occurs as the chemicals in the resin degrade when exposed to UV rays. While you can’t completely prevent yellowing, there are some methods to minimize it:
Using UV-Resistant Resin: Choose a high-quality epoxy resin designed to resist yellowing. Many premium resins now contain UV stabilizers that protect against color changes over time.
Proper Storage: Avoid placing resin keychains in direct sunlight for prolonged periods. Store them in dark, cool places when not in use to preserve their clarity.
Re-polishing: If your keychain starts to yellow, you can polish it with a fine abrasive compound and then apply a fresh coat of UV-resistant resin to restore its clarity.
Yellowing can’t always be avoided, but these precautions can extend the life and aesthetic appeal of your keychains.
4. How to Handle Resin Leaks from Molds
Resin leaks from molds are a common issue when the mold isn’t properly sealed, or the resin is too thin. Here’s how to prevent and fix leaks:
Step 1: Seal the Mold Properly
Step 2: Check the Mold Before Pouring
Step 3: Adjust the Resin Viscosity
Step 4: Curing the Resin
5. Fixing Poorly Set or Soft Resin Keychains
When your resin keychain is still soft or bendable after curing, it could indicate that the resin hasn't properly set. Below is a quick guide on how to address the issue:
| Problem | Possible Causes | Solution |
|---|
| Soft Resin Keychain | - Incorrect resin-to-hardener ratio | - Mix the resin and hardener thoroughly according to instructions. |
| - Insufficient curing time or temperature | - Leave the keychain to cure in a warm, dry area for an extended period. |
| - Low-quality resin that doesn’t cure properly | - Use high-quality epoxy resin that has been tested for reliability. |
| Resin Too Soft | - Environmental factors like humidity or temperature | - Ensure the working area is at an optimal temperature (70-75°F or 21-24°C). |
By following these steps and making the necessary adjustments, you can fix soft resin and enjoy a perfectly set keychain.
Troubleshooting common resin keychain problems can be challenging, but with the right approach, most issues are fixable. From sticky resin to air bubbles, following the outlined steps will help you achieve smooth, professional results. For anyone new to resin crafting, knowing how to handle these problems ensures your creations will turn out exactly as planned.
Conclusion:
Creating custom resin keychains is an enjoyable and rewarding craft that allows for endless creative possibilities. From choosing the right resin to designing unique shapes and finishing them to perfection, each step of the process offers an opportunity to make something truly personal. By understanding the different resin types—whether it’s epoxy resin, polyester resin, or clear resin—you can tailor your keychain creations to match any style, whether you're crafting a minimalist, geometric design or an intricate, floral pattern.
Through the casting techniques, finishing methods, and even troubleshooting common issues like sticky resin or air bubbles, you’ll be well-equipped to create durable, high-quality keychains that stand out. If you're looking to turn your hobby into a small business, understanding how to price, market, and sell your custom resin keychains will set you on the right path.