

Table of Contents
“These could use a little personality”? You’re not alone. More and more people are searching how to make custom jibbitz for Crocs?—not just to show off their favorite colors or characters, but to stand out in a sea of rubber sandals. From handmade charms to personalized logos, custom Jibbitz are turning everyday footwear into walking conversations.

Think of them like stickers for your shoes—only cooler. Some folks use Shrinky Dinks or resin; others turn to Cricut machines or online shops to get theirs just right. “Jibbitz are a form of self-expression,” says Megan Weller, a popular DIY crafter. “You can literally wear your personality.”
This guide breaks down the tools, tricks, and options that’ll help you make Jibbitz your way—whether you’re crafty or just want to click 'buy now' and call it a day.
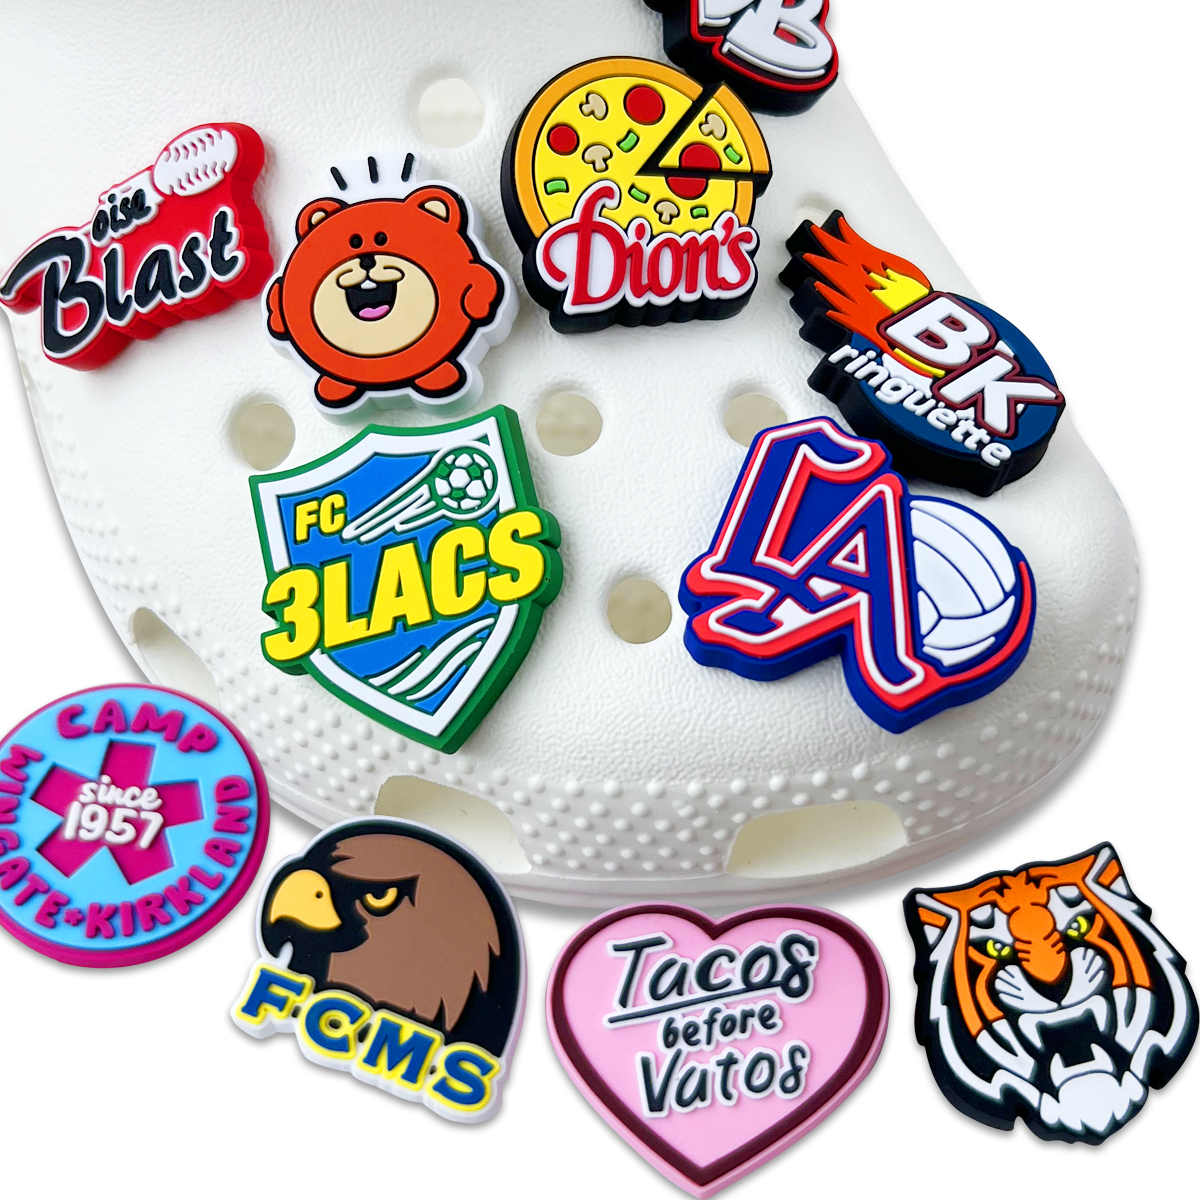
“Crocs are cool, but Jibbitz make them you,” says Lisa Tran, a long-time collector with over 200 custom charms snapped across her bright yellow pairs. These little accessories—called Jibbitz—are decorative charms designed to fit snugly into the holes of Crocs. They are not just decoration. For many, they represent personality, storytelling, or even branding.
According to Crocs Inc., over 150 million Jibbitz have been sold globally since 2006. These accessories evolved from playful buttons into full-blown expressions of culture, style, and identity. Customization adds a layer of fun that turns a casual slip-on into a walking billboard of someone’s vibe. Kids love adding superheroes and emojis. Adults are choosing logos, initials, even charms that match their job uniforms.

Brand strategist Karen Owens shares, “Jibbitz have become part of self-branding—small, wearable billboards for people’s beliefs or moods.” The personalization industry has boomed, with Etsy sellers reporting record sales of handmade Croc charms in 2024.
Popular for party favors, school events, or company swag, custom Jibbitz bring style and function together:
Lightweight, waterproof, and durable for daily wear
Fully removable, making them easy to swap and update
Endless design options, including glow-in-the-dark, glitter, or 3D-print versions
This trend is not going anywhere. Crocs’ official site now offers a design-your-own Jibbitz tool, backed by award-winning design partnerships. It is style, comfort, and creative expression—all in one hole-punch-sized accessory.
When it comes to making Jibbitz, should you roll up your sleeves or open your wallet? This section breaks down cost, time, and gifting potential—no fluff, just facts.
DIY can seriously stretch your budget—or eat it up.
DIY materials like polymer clay, glue, and charm bases can add up. You might spend $10–$25 for basic tools, but you’ll get multiple charms out of it.
On the flip side, store price for one custom Jibbitz on Crocs.com? About $4–$7 a piece.
Sales and discounts can tip the scale, but factor in labor cost (your time).
Cost Breakdown
| Option | Average Cost per Charm | Total for 5 Charms |
|---|---|---|
| DIY (basic kit) | $2.50 | $12.50 |
| Store-Bought | $5.00 | $25.00 |
If you’ve got the time, Jibbitz crafting is a chill afternoon project.
Preparation time: 10–15 min (design, gather tools)
Crafting time: 30–45 min (depends on the design)
Drying time: 1–2 hours (resin or clay curing)
Total duration: Around 2–3 hours, give or take
“Beginners might take longer,” says DIY vlogger Tanya Claymore, “but it’s fun once you get the hang of it.”
A handmade gift feels special—ideal for birthdays or quirky stocking stuffers.
Store-bought gifts shine for polish and presentation, especially when time’s tight.
Want your charm to scream “I saw this and thought of you”? Go personalized gift all the way.
In a nutshell: 👉 Handmade = heart and uniqueness 👉 Store-bought = sleek and fast Pick what fits your recipient preference and the special occasion.
Before you dive into making your own Crocs charms, you'll need the right gear. This cluster breaks down the best materials to help your designs stick, shine, and last.
Polymer clay is a go-to for crafting small, detailed Jibbitz. It comes in tons of clay colors and can be baked for long-lasting durability. Beginners should use soft clay brands that are easy to condition. Use clay cutters, charm blanks, and sculpting tools to shape your charm design. Once molded, bake the clay following package instructions. Add jewelry findings if you want to convert the charm into earrings or other accessories.

For a glassy, pro-level shine, nothing beats resin.
Epoxy resin is ideal for larger charms
UV resin cures faster but needs a UV lamp
Mix with resin pigments for color or glitter
Always wear safety gear and stir slowly to reduce bubbles
“Resin is art and science,” says Kayla Gordon, a resin charm designer on Etsy. “It’s all about the mix ratio, the mold, and your patience.”
Not all adhesives play nice with Crocs or charm materials. Here's a quick breakdown:
| Adhesive Type | Strength Rating (1–10) | Waterproof |
|---|---|---|
| Super Glue | 9 | Yes |
| Hot Glue | 4 | No |
| Epoxy Adhesive | 10 | Yes |
Go for epoxy adhesive when you need a super strong bond with long drying time. Craft glue works for low-stress decorations, but don’t expect it to survive a rainstorm.
Starting out? Here’s your essential Jibbitz kit:
Craft knife – for slicing clay or trimming details
Cutting mat – protects your workspace
Glue gun – fast attachment, decent hold
Tweezers – place small parts like a pro
Wire cutters – trim findings or charm backs

These basic tools get you going without blowing the budget. Think of it like building your Jibbitz toolbox—start simple, upgrade as you grow.
Ready to roll up your sleeves and craft some awesome Jibbitz from scratch? Here’s where the magic (and the glue) happens.
Making your own Jibbitz charms from polymer clay is like baking mini pieces of wearable art. You'll want to condition the clay first—basically knead it until it's soft and ready to sculpt. Use simple tools (even toothpicks!) to shape your design.
Next, bake it. Most polymer clays cure at 260°F–275°F for about 15–30 minutes, depending on thickness. Don’t crank up the heat—you’ll just burn your charm and stink up the kitchen. Let them cool completely before painting or glazing.
Pro tip: “Never rush the curing stage,” says clay artist Dana Howell. “It’s the difference between a charm that lasts years or cracks next week.”
To make your charm actually stay on a pair of Crocs, you’ll need charm bases—also known as jewelry findings made for shoe embellishments.
Start by selecting a base that fits snugly into Crocs’ holes.
Apply a strong adhesive like E6000 to the back of your baked charm.
Press the base on firmly and let it cure overnight for a secure hold.
🎯 Tip: Avoid hot glue—it doesn’t hold up under flex or outdoor wear. Go for industrial-strength glue that bonds plastic and rubber without turning gooey.
Using a Cricut to make Jibbitz is a total game-changer—it’s like upgrading from crayons to a 3D printer. Let’s break down the process step by step.
A clutter-free craft room makes all the difference. Keep your Cricut machine near a power outlet, with good lighting and an organized desk setup. Store materials by type—like vinyl rolls and transfer tape—within arm’s reach. Add a scrap bin and mount your cutting mat for quick access. This setup saves serious time and headaches.
Not all materials play nice with your blade. Here's a quick guide:
| Material Type | Compatible Blade | Transfer Method |
|---|---|---|
| Adhesive Vinyl | Fine-Point | Transfer Tape |
| Iron-On Vinyl | Fine-Point | Heat Press / Iron |
| Faux Leather | Deep-Point | Heat or Glue |
Match material properties to your project requirements, and always test cut first.
Want your charm to pop? Try layering techniques with both adhesive and iron-on vinyl. Use registration marks in Cricut Design Space to nail alignment. Add dimension by slightly offsetting colors and layering with care. Tip: Stack lighter colors on top so your design doesn’t look muddy.
Small but mighty, a mini heat press is perfect for Jibbitz. Here’s how:
Preheat your heat press machine to 305°F.
Place your design on the Jibbitz blank.
Apply medium pressure for 10–15 seconds.
Let cool, then test for adhesion.
As vinyl artist Jana Smith says, “The trick isn’t just the heat—it’s giving it time to cure.”
Outdoor Crocs? You’ll need charm armor. Apply a resin coating or UV sealant over your final design to boost waterproofing and charm durability. For best results, cure under a UV lamp and avoid bubbling by sealing in layers. These steps are clutch if your Crocs go camping, boating, or hit the beach.
Looking to skip the crafting and just buy custom Jibbitz that wow? This cluster breaks down the best online options, from small-batch shops to bulk-order businesses.
Etsy is the hotspot for handmade Crocs accessories. You’ll find everything from anime-themed Jibbitz to glittery initials, often made by small-batch sellers with rave reviews.
Popular shops: Look for names like CharmByJules or GibbzGalore, often tagged as Etsy’s Picks.
Watch for: 4.8+ star ratings and photo reviews—these signal trusted sellers and quality craftsmanship.
Bonus tip: Some sellers let you bundle charms for discounts, so mix-and-match is a vibe!
Crocs.com offers an official online customizer that lets you personalize your shoes and Jibbitz straight from the source.
Choose your Crocs base (color, style).
Add Jibbitz from their pre-loaded designs—think letters, flags, sports icons.
Preview your look, buy, and rock your custom shoes in days.
It’s a smooth, user-friendly process with plenty of design options. The site sometimes drops limited edition collabs too!
Planning a team event, wedding favor, or small biz giveaway? Bulk orders make it doable—and way more affordable.
| Order Size | Est. Discount (%) | Avg. Delivery Time (days) |
|---|---|---|
| 50–100 | 10–15% | 10–14 |
| 100–500 | 20–25% | 14–21 |
| 500+ | 30%+ | 21–30 |
Minimum orders vary by vendor, and shipping speeds can fluctuate depending on customization complexity. For business clients, it’s worth asking about logo imprinting options too.
Want to take your Jibbitz game to the next level? This section dives into how you can create custom Crocs charms using brand logos, personal photos, or themed designs for events like weddings.
Custom Jibbitz with brand logos are trending in corporate swag and influencer merch. Just be mindful of licensing and intellectual property—you’ll need permission to recreate trademarked symbols. Production uses resin or polymer molds, and logos should be submitted in high-res vector file formats for best clarity.
Putting personal photos on charms turns them into little memory nuggets. Think: your dog, a vacation moment, or a baby’s first smile. Use resin domes or printed vinyl overlays for best results. "People love turning snapshots into wearable memories," says Kelly Rhodes, founder of Charm It Up Co.

These are like the party favors you didn’t know you needed. Wedding and party Jibbitz can include initials, inside jokes, or event motifs like palm leaves or rings.
They’re great as take-home gifts
Match event colors or themes
Can be styled with jewelry-like details
SVG – Best for clean edges and scaling
PNG – Great for transparent backgrounds
JPG – Usable but often lower quality
AI or PSD – Editable for advanced customization High-resolution files avoid blurry or jagged prints on small charms.
Here’s a quick look at common photo printing options for Jibbitz:
| Shop Type | Price Range | Turnaround Time |
|---|---|---|
| Etsy Sellers | $$ | 3–7 days |
| Local Print Shops | $$$ | 1–3 days |
| Amazon Services | $ | 5–10 days |
These services let you upload your design and choose the material finish, from matte to glossy.
You gotta scale back the detail. Charm size limits how much you can cram in—think bold lines, fewer colors, and clean shapes. Complex images can blur or lose meaning.
Avoid intricate patterns
Keep facial features simple
Choose high-contrast colors for clarity
“I have had mine on my Crocs for over six months now—no cracks, no fading, and they have been through the rain, beach sand, and even a kid’s birthday party,” laughs Amanda Lewis, a seasoned Etsy seller known for her custom polymer clay Jibbitz. Her experience aligns with what many crafters report when high-quality materials and the right adhesives are used.
The durability of homemade Jibbitz really comes down to three things:
Materials Used: Polymer clay and UV resin are by far the most trusted materials for crafting. Both withstand water exposure and resist warping from heat. Cheap plastics tend to crack under stress or sun.
Adhesives and Sealants: Industrial-grade E6000 glue is a top pick for attachment strength. A clear, matte sealant helps preserve colors and adds a protective barrier against scratching.
Crafting Process: A slow, fully cured bake or resin hardening session, paired with sanding and topcoat sealing, significantly increases the longevity of the charm.
🧪 In 2022, CraftHub ran a wear test where DIY Jibbitz were submerged, frozen, and exposed to daily wear for 30 days. The polymer-resin combo held up strongest, showing no structural damage. This small but detailed test continues to circulate on craft forums as a credibility benchmark.
As materials expert Rachel Lin from Makers Central notes, “The strength of homemade Jibbitz comes from the prep—if the charm is rushed, it will pop off faster than you can say ‘limited edition.’” Many buyers also appreciate creators who include care instructions or product testing photos, adding trust and authenticity.
So are they durable? When made right, absolutely. Better yet, they often outlast many cheap mass-produced options.
You’ve seen the routes: make it yourself, cut it with a Cricut, or snag a custom set online. “Creativity is intelligence having fun,” Einstein supposedly said—and hey, it fits.
So go on, make something bold, weird, or personal. Your Crocs are basically a blank canvas. Show the world what’s on your feet and
Absolutely! If you’ve got a Cricut machine, you’re already halfway there. You can use it to cut vinyl, faux leather, or shrink film into creative shapes. Just remember to seal your designs if they’ll be exposed to moisture.
Polymer clay – great for sculpted shapes
Shrinky Dinks – perfect for 2D illustrations
Resin – glossy, durable, and highly customizable
Vinyl – ideal when using Cricut machines
Not necessarily! You can mold them by hand if you’re using polymer clay or design flat charms with shrink plastic. But if you want consistent shapes (like hearts or logos), silicone molds can really speed things up.
You’ll need a charm base (the part that snaps into the Crocs hole). Glue it to the back of your charm using E6000 glue or a strong epoxy. Let it cure completely—don’t rush it, or the charm might pop off when you least expect it!
Crocs.com – use their official customizer tool
Etsy – tons of handmade and themed charms
Amazon – budget-friendly multipacks
PromoLocker – good for bulk or logo orders
Sort of. It depends on the material and the finish you use. For example, resin charms with a UV sealant tend to hold up well to water. Clay charms may need extra sealing. Either way, don’t go swimming in them—Crocs or not!
Use high-resolution images
Print on clear or frosted shrink paper
Seal with a UV-resistant topcoat
Use quality adhesive (like industrial-strength glue)
Let glue dry for at least 24 hours
Avoid overloading the charm with weight
Push the base firmly into the Crocs hole
They really do! Custom Jibbitz are fun, personal, and super affordable. Whether it’s a kid’s favorite character or a friend’s initials, they’re a clever gift that shows you put some thought into it—without breaking the bank.

Join our newsletter
Let's be friends with benefits
Be the first to get product launches, discounts and
exclusive content straight to your inbox.

SHOPZENMA
Office Hours: Mon- Fri 9 AM - 5 PM (EST)
Contact Us
[email protected]
